Archive for the Layouts Category

G: Glimpse of U + Grand Time… + the Great Adventure…

Posted in 26 letters: 26 weekends, Layouts with tags , , , on April 6, 2009 by kaleidoscopelife

Here are the layouts I made for our 26-letters: 26-weekends challenge over @ ScRaP CiRcLe.

I finished my “G” layouts on-time, just wasn’t able to post it here yesterday ‘coz you know, LIFE happened and before I knew it, it’s midnight already. Anyway, I managed to make 3 LOs this week… yup, I’m still in a very productive mood by my standard that is. 🙂 So here we go… first up is the “Glimpse of U” page.

glimpse-9

the page design:

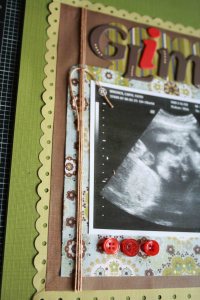
I love how this turned out and to think I only used scraps from the previous LO I made a few months back which I will share with you in the next few days. Anyway, this may seem like a one-photo LO but it’s really not. I wanted to include all the ultrasound photos of Zach but I don’t want to over crowd the page, so I did this…

glimpse-2

As you may have noticed, I like to include a lot of photos on my pages and I’m always finding ways to do it without ending up with the same look. This accordion style is kind of cool!

the title:

I wanted to include a hidden message on my title and I wanted it to stand out, so I chose a different color, in this case, it’s RED for the “i {heart} U”. I must admit I wasn’t too sure about the color combination ‘coz I like my pages to be coordinated plus red and green is so Christmas-y. (Changing the paper was not an option ’coz I already adhered it). But to really get the message across I had to be bold. Anyway, I like to think that the RED added visual interest on this otherwise, ordinary page.

glimpse-3

glimpse-4

glimpse-5

other details:

The string was inspired by my idol, Laura Vegas. She uses string on most of her LOs and I just love the effect, so from now on, I’ll try to incorporate it on my LOs, I hope she won’t mind that I copied her idea.
glimpse-6

The lace doily for matting and the letter “Z” for Zachary.

glimpse-7

And I added {3} buttons to balance the red elements.
glimpse-8

Next is the “Grand Time, with Grandpa, on the grand piano” LO. I wanted to document Zach’s love for music at such an early age. He was six months old when we found out that he will eat without any protest if he hears the “Love Song” by Sara Bareilles. (My sister would play this song on her cell phone). From then on, he soon discovered music videos on MTv and MYX, and mind you he has his own favorites. 🙂 Once he hears the intro of his favorite songs he will stop what he is doing and just watch … I can’t even do that, I have to hear the lyrics before I can identify the song ‘coz apparently I’m tone deaf. He got his love for music from his Grandpa who plays the piano and guitar and can also sing well. I’m glad I captured this candid moment and I am able to document their shared interest.

grand-time-1

Since the title is so full of “grand”, I wanted this page to look grand and I think I have achieved that. From the luxurious paper to the glittered title and intricate looking accents/embellishments, this LO really look grand to me.

I love the flourish behind the “G”. I stamped it using my Autumn Leaves flourishes acrylic stamp before adhering the “G”.

grand-time-2

For the chandelier, I downloaded it from the internet and printed it on a glossy photo paper and then cut out the image. I had a hard time cutting the intricate detail so I just inked it using a light brown chalk ink to fit the background but when it was all dry I discovered that the black part kind of lost its shine because of the chalk, good think I have a black slick writer so I just covered it up being careful not to color the brown parts. Its hard work I know but I love the final outcome.

grand-time-3

For added detail, I used my Bo Bunny black lace ribbon which I absolutely love and some bling. I also matted the focal photo with again the doily which I inked a little to fit the background.

grand-time-4

For the journaling, I hid it behind one of the smaller photos. You just have to open the photo to reveal it.

The last LO is “the Great Adventure at the Grand Canyon”. I dug deep into my photo box and got these 1996 photos of my DH. These photos were taken while he was vacationing in the US way before we got married.

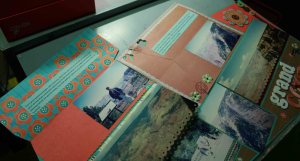
Again for this LO, I wanted to include all the photos of him at the Grand Canyon ‘coz I don’t want to waste all those panoramic shots. I had a difficult time creating this 2-page LO with {5} panoramic pics and {7} 3×5 pics but I was up for a new creative challenge so here it goes.

I started out by laying down my CS as foundation and then arranging the photos to the placement it is now. If you’ll notice, I arranged the photos to mimic the boulders you see on the photo and it also reflects the horizontal lines of the Grand Canyon.

grand-canyon-1

My original idea was to create a pocket to insert all those extra pics but I decided to just do this…
grand-canyon-5

and more hidden photos…

grand-canyon-6

I also punched some of the photos using my Fiskars threading water puncher to break all the lines.

grand-canyon-7

grand-canyon-8

Here are close up shots of the title…

grand-canyon-12

grand-canyon-13

grand-canyon-14

I also embellish some of the photos using string and flowers.

grand-canyon-9

grand-canyon-10

For the journaling, I asked my DH to write down his story so that I can include it on the LO. I then adhered it on the inside pages.

grand-canyon-11
To finish off this LO, I just added a few embellishments.

grand-canyon-2

grand-canyon-3

grand-canyon-4

So I guess that’s it for my “G” week. Do check out my sister’s work here. I’m off to plan my “H” project… I still don’t have any idea what to do, so wish me luck. I’ll also be working on my December Daily this week. I hope to finish it and share it with you in two weeks time.

Thanks for dropping by ’til next time. Have a wonderful week you all. Continue reading

F: Faces of Zach + a few of Zach’s FIRST milestones

Posted in 26 letters: 26 weekends, Layouts with tags , on March 21, 2009 by kaleidoscopelife

Here is my “F” week project over at ScRaP CiRcLe. You can also check out my sister’s take on our 26 letters: 26 weekends challenge here.

For the record, I have officially made 7 1-page layouts, 3 2-page LOs, 1 altered project and ½ mini-album (The other half is still put on hold until… I don’t know when. LOL) and I still have a few lined up before the month ends. WOW! That is a lot of output from me. 🙂 I must say I’m proud of myself for sticking with our 26-letters: 26-weekends challenge and I am truly “enjoying the process”. (ala Heidi Swapp) 🙂

I had a lot of projects planned for “F” week but unfortunately I didn’t have enough time to finish it all because it was a very busy and tiring two weeks with 2 out of town trips.

Anyway here are my LOs…

Faces of Zach

My hubby, my sister and I have a lot of favorite photos of Zach and since I can’t scrap it all individually, I decided to make just one LO out of all our favorites. These photos were taken when Zach was less than a year old.

faces

Since this LO is loaded with a lot of photos I did not feel the need to add a lot of embellishments. I just added some gromlets, a few stars and circles, ribbons, buttons and of course the title and it’s done.

f1

f2

f3

I also added photo captions on each picture to illustrate Zach many expressions.

f4

My hubby loves this LO and it never failed to put a smile on his face every time he looks at it. 🙂

~~~~~~~~~~~~~~~~~~~~~~~~~~~~~~~~~~~~~~~~~~~~~~~~~~~~~~~~~~~~~~~~~~~

Zach’s FIRST milestones

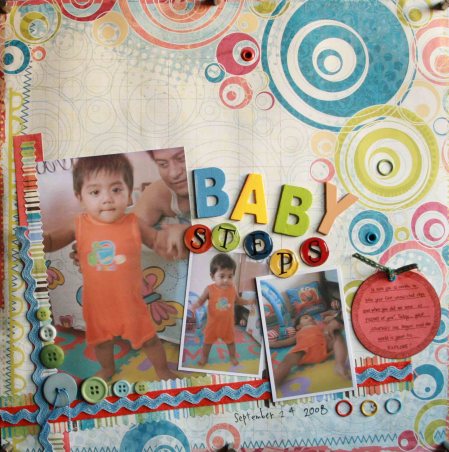
FIRST STEP: Baby Steps

Capturing and documenting Zach’s milestones is one of the many reasons why I started scrapping. I know I am a lucky Mom to be able to do this and I am so grateful.

I finished this LO in a short period of time. I didn’t really do much with this one. I love the paper so much that I did not have the heart to cut it up. LOL. So I just adhered it to a cardstock, added the photos, stripe paper, ribbons, buttons, title, journaling and tadah… it’s done.

baby-steps

Up close:

baby-steps-1

baby-steps-2

baby-steps-3

This is a simple and easy to make LO and the outcome is one fun and lively page.

~~~~~~~~~~~~~~~~~~~~~~~~~~~~~~~~~~~~~~~~~~~~~~~~~~~~~~~~~~~~~~~~~~

FIRST SOLID FOOD: Spoon FULL of… LOVE

This is one of my favorites. I just love the color combination and the layout of the whole page. When I started making this I really didn’t have an idea how it will look like.

spoon-full-of-love

I would have used some chipboard and rub-on letters for the title but since I don’t have any, I decided to stamp the letters and added string and flowers.

spoon-full-of-love-title

A little bit of flourishes and bling…

spoon-full-of-love-1

My journaling tag... (I still have to write my journaling for this one).

spoon-full-of-love-tag

More details…

spoon-full-of-love-2

~~~~~~~~~~~~~~~~~~~~~~~~~~~~~~~~~~~~~~~~~~~~~~~~~~~~~~~~~~~~~~~~~~

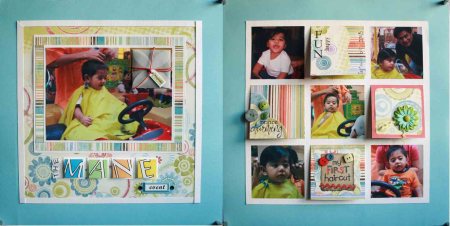
FIRST HAIRCUT: The Mane Event

I have to admit that I made this LO late last year but since I consider any LO unfinished until I share it then technically this is still new. 🙂

This is one of those pages that took me a long time to finish because {one} I wanted to include a lot of photos, {two} I don’t know how to do it without over crowding the page and {three} I don’t normally do a two-page LO. After reading Ali Edwards’ A Designer’s Eye for scrapbooking book I got inspired to do this…

mane-event

I created balance on the 2 pages by {one} using one focal photo on the first page and a gathering of photos on the second and {two} the elements on both pages are visually equal.

mane-event-1st-page

I included some of Zach’s hair and put it inside a vellum envelope I created.

mane-event-keepsake

I printed the title (MANE) using free fonts from the net I just edited the colors to fit with the paper. I would love to acknowledge the designer of this font but honestly I forgot where I downloaded it. I’m sorry for not mentioning your name but I’m really thankful.

mane-event-title

Here is the second page.

mane-event-embellishments

I solved my dilemma of not overcrowding the page with a lot of photos by hiding some of them. I created these flaps on the cardstock by using a craft knife and adhering the four photos under it. I then proceeded on embellishing the top with elements that matches with the first page.

mane-event-flap2

mane-event-flap3

Even though it took me awhile to finish this LO, I am happy with the outcome.

I still have a lot of “Zach’s FIRST” to scrap like his first bath, his first swim and so on but since I don’t have the time to finish it all I am considering “F” week as an unfinished project like my “D” week. 🙂

That’s it for now. Thanks for dropping by and checking out our site. I hope you can find the time to drop by again.

E: great EXPECTATIONS

Posted in 26 letters: 26 weekends, Layouts with tags , on March 7, 2009 by kaleidoscopelife

Here is my take on our “E” week over at ScRaP CiRcLe. For the first time I am finally on time. 🙂

I decided to make a page about me being pregnant with Zach. This has been on my “to scrap list” for the longest time and now he is already 1 year and 6 months old… so it’s about time I finally did it.

photo-1

The original title was actually “Expecting YOU” but in the middle of the project I decided o change it. I like this title better and anyway, the story I wanted to document is the feelings I had while I was EXPECTING Zach. I opted to document this stage in my life for the following reasons… {one} this is a first for me… {two} I want to remember how it feels like to be pregnant just in case I want to go through this again. LOL.

the DETAILS

Selecting the paper was hard… I knew beforehand that I was going to use the Provo Craft maternity themed paper my sister, Hope, gave me more than a year ago, but finding the coordinating paper that went with it was hard. The “wave” paper is actually part of DCWV’s Christmas collection but since the colors matches the CS and my PP I decided to use it and anyway it’s not really that “Christmasy”.

wave-pattern

I matted the photo with a plain pink paper that I tore and inked for a distress look and then embossed using my Cuttlebug. I adhered the photo using a double-sided foam tape for added dimension.

matting

I wanted to incorporate my Prenatal Record so I tucked it behind the photo and my journaling. You can actually pull it out for a closer look.

med-record

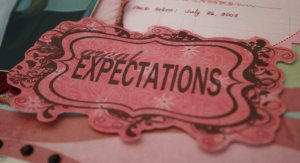
For my title, I made use of Heidi Swapp’s free digital elements and I just edited it to fit my needs. I printed it on a CS and cut along the image.

title

The paper flower I made using my Cuttlebug and I added Petaloo silk flowers with DCWV brad on top. I adhered it using pop dots.

flowers

To finish it off I added a burgundy lace ribbon behind the photo… I stitched and adhered buttons on the Prenatal Record to draw the viewer’s eyes on it and lastly I added black crystals/bling to outline the wave pattern of the paper.

That’s it for my “E” project. Stay tuned for our “F” week. I am planning to make more than one LO for this one. As for my December Daily… still no update but I haven’t forgotten it. 🙂

Thanks for dropping by and have a happy weekend you all.

My first Kaya challenge layout

Posted in Challenge Entries, Layouts with tags , on February 27, 2009 by kaleidoscopelife

U R My Sonshine

I finally decided to join in the fun over at Pinoy Scrapbookers’ blog.

The challenge for this month is to:
1)    Create a LO about a love one
2)    Choose a song associated with your love
3)    Use song title or a phrase from the song you chose
4)    Journaling should be the entire song or part of the song that is meaningful to you
5)    Use stitches… hand or machine made

Here is my take…

u-r-my-sonshine
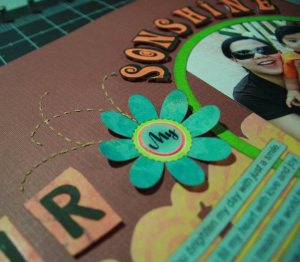
This LO is inspired by the song “You Are My Sunshine”. I just played with the title a little bit and changed it to “U R My Sonshine”. There is one verse in the song that really conveys how I feel about my one and only son. I’m sure most of you are familiar with this song.

Up close:

stitching-technique

Some stitching…

journaling
Journaling:

-You brighten my day with just a smile.
– You fill my heart with love and joy.
– You mean the world to me.
– You are my everything.
I wouldn’t ask for anything more coz’ I have you, my perfect little “SONSHINE”!

love,
Mommy

When I see the world through your young eyes, everything becomes new again.
The moon is brighter, the sun warmer, and the stars even more mysterious.
Yet nothing is as glorious as YOU. ~~~ Maya Angelou ~~~

This is the song lyric that I incorporated in my LO:

You are my sunshine, My only sunshine.
You make me happy when skies are grey.
You’ll never know, dear, How much I love you.
Please don’t take my sunshine away.

Materials Used:

K & Company Mira Golden Swirl Die-Cut Paper, DCWV Cardstock, MY Mind’s Eye, Magnolia Collection Paper, Computer Fonts, Buttons, Diamond Glaze, Colorbox Ink Pad, Tombow and Zots adhesives

You can check out my entry as well as the other beautiful entries here.

Thanks for dropping by. ‘Til next time. Have a safe and happy weekend you all.

D: December Daily (batch 1)

Posted in 26 letters: 26 weekends, December Daily, Layouts with tags , , on February 21, 2009 by kaleidoscopelife

Yah, I know I’m two months behind in making this project…but I can explain! My very generous sister Hope made two sets of December Daily (DD) albums… one for her and one for me. She sent it to me last December, right before Christmas and I got it last month. I wasn’t able to work on this right away because I still have some projects to finish plus we started on our 26-letters: 26 weekends Challenge, so needless to say I had my hands full.

I have to admit that I almost did not push through with this project. I was thinking of using this for my 2009 DD but when I thought of how much my sister spent (money & time) so that I can document our holiday made me feel guilty. And I know she is going to be disappointed if I back out.

So for my “D” week I decided to work on this album. I know this is a big project to embark and I need more than 2 weeks to finish it but this is my opportunity and if I’m not going to work on it now then I may never find the time or the right motivation to do so.

Anyway, brace yourself to a pic-loaded post coz here comes the first batch. I finished days 1 to 14 and I’ll be working on the rest while also doing my take on “E” week. Good luck to me. 🙂

front-coverFront Cover (Holiday Memories)

It looks exactly like my sister’s but the content is very different…

cover-page1Cover page (2008 December to Remember)

cover-pageUp close (2008 December to Remember)

page-1-2Pages 1 & 2

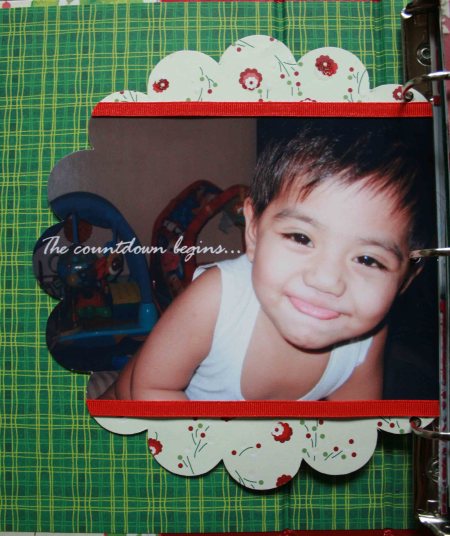
page-11Up close: page 1 (The countdown begins…)

page-2Up close: page 2

Note: This tag I got from Jessica Sprague’s Stories in Hand on-line class. I just edited the color and the text. When you lift the page, you can find my journal for this particular day. It is attached to a sheer page.

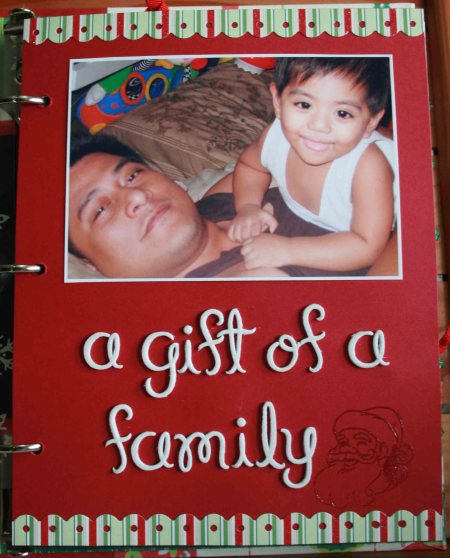
page-3-4Pages 3 & 4 ( a gift of a family)

Note: For the 3rd page, I haven’t decided yet if I want to add something or just leave it as it is.

page-4Up close: page 4

page-5-61Pages 5 & 6

page-5Up close: page 5 (Jolly Young Fella)

page-6Up close: page 6 (1, 2, 3 Kiss)

page-7-8Pages 7 & 8

page-7Up close: page 7

page-8Up close: page 8 (moments)

Note: Journaling behind the photos.

page-9-10Pages 9 & 10

page-9Up close: page 9 (Sights & Sounds of Christmas)

page-10Up close: page 10

page-11-12Pages 11 & 12

page-111Up close: page 11 (silent night)

page-12Up close: page 12 (7)

page-13-14Pages 13 & 14

page-13Up close: page 13 (Notes from Today)

page-141Up close: page 14

page-15-16Pages 15 & 16

page-15Up close: page 15

page-16Up close: page 16 (fun memories)

page-17-18Pages 17 & 18

Note: For page 17, I still have to add my journaling.

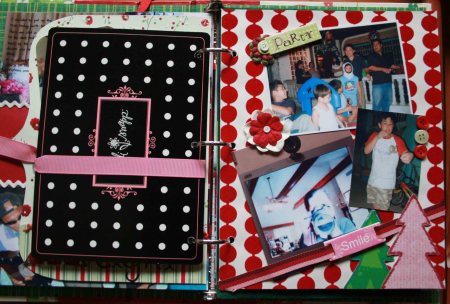
page-18Up close: page 18 (Party)

page-19-20Pages 19 & 20

page-19Up close: page 19

page-20Up close: page 20

page-21-22Pages 21 & 22

page-21Up close: page 21

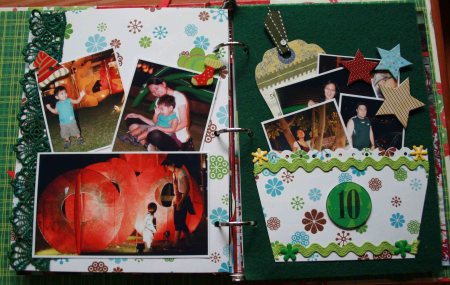
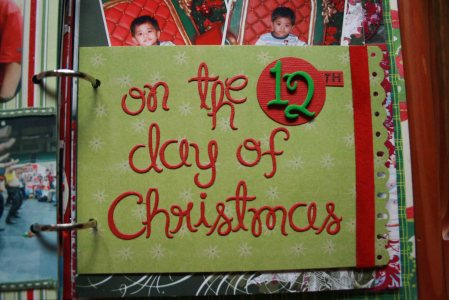
page-221Up close: page 22 (on the 12th day of Christmas)

page-23-24Pages 23 & 24

page-23Up close: page 23

page-24Up close: page 24 (Mommy, where’s Santa?)

page-25-26Pages 25 & 26

page-25Up close: pages 25 (all wrapped up)

page-26Up close: page 26 (Around the House)

Note: I had to edit each photo so that it will show through the overlay page). Hard work! 🙂

page-27-28Pages 27 & 28 (Trimmings)

albumThis is what it looks like from the side. I still have more room for the remaining pages but I have to be careful not to overdo this.

Whew, I’m finally done! Good thing I only finished days 1 to 14, if not, it would have taken me forever just to post this. LOL. Anyway, I’ll be sharing the rest of the pages when I’m done. As to when it will be, I still don’t know but do drop by to check it out.

Ok that’s it for now. Thanks for dropping by. See yah.

C: behind the CAMERA lens + altered CANs

Posted in 26 letters: 26 weekends, Altered Projects, Layouts with tags , , on February 7, 2009 by kaleidoscopelife

Sharing with you the projects I did for our 26 Letters: 26 Weekends challenge my sister and I are doing over at ScRaP CiRcLe.

behind the CAMERA lens

For my “C” week, I decided to make a LO about myself, a first I might add. I had fun making this girlie LO for a change.

cam-1

With this LO, I challenged myself to break away from my usual linear pages and just experiment. With this output, I think I have achieved that. Placing my photos and embellishment at an angle really made a lot of difference and I’m happy with the end result.

cam-2

Another challenge I tackled is to use multiple papers in one LO. It may be easy to some but not to me. I find it hard to layer papers mainly because I don’t want to waste too many. I’m a practical scrapper, if I can get away with using just 2 patterned papers then I’d do it. But the look of layered LOs really appealed to me so I just had to try it. What I found out while doing this, is that you don’t really need to use a lot, the trick is to just cut out enough paper that will show in the finished project. Like the white floral paper in the background, it’s really just 3 inches by 5 inches but when you look at it, it seems like a 10”x5”, right? ;-)For the rest of the papers, like the one peaking thru the focal photo and the stripe at the bottom, they are all scraps from previous projects. So for this page, instead of me using 2 PPs I managed to use 4, not bad! 🙂

cam-5

For the title, I used my Cuttlebug die-cutting machine for the “behind” and “lens” and for the “CAMERA”, since I don’t have the color I wanted, I just painted the wood letters with Making Memories Acrylic paint and stamped an image to add visual interest.

cam-3

Up close:

cam-4

cam-62

Supplies & tools used:

Prima Patterned Papers, Sasha Collection
DCWV Cardstock
JO-ANN Paper
MAMBI paper – stripe
Prima & Petaloo Flowers
K&Company journaling card
Foam sheet
Wooden letters
Assorted buttons
Lace ribbon
Cuttlebug Machine
Making Memories Funcky Vintage acrylic paint
StazOn and Colorbox ink pads
EK Success & imaginisce clear stamps
Fiskars Threading Water border puncher

That’s it for my page now unto my altered cans.

Altered Cans

1

These are the cans that hold the 5′ Prima flowers. I decided to alter these to use as my rubber stamp storage.

the supplies…

suppliesblack cartolina + felt ribbon

The process is really simple. I used black cartolina to cover it up…

cover-with-cartolina

…and I added the felt ribbon and flowers   as accents.

altered-cans

For the label, I traced a flower shape unto a cardstock cut it out and painted it to match the hot pink ribbon lace, then I stamped it… adhered it to a background paper… glued it to the can and that’s it. Really simple and easy to do project.

stamped

And here is the finished project. I did not put a label on the other can ‘coz I still don’t know what to put in it. Anyway, these cans now sit on top of my embellishment center.

That’s it for now. Stay tuned for our “D” week. Thanks for dropping by.

B: Birthday layouts

Posted in 26 letters: 26 weekends, Layouts on January 24, 2009 by kaleidoscopelife

These layouts are part of the 26 letters, 26 weekends project me and my sister, Hope, is currently doing. Here is my take on our “B” week.

Five months after Zach’s first birthday and I’m finally done scrapping the photos for his album. I’m so glad to finally cross this out of my long list of photos to scrap. 🙂

Here is the first page: A Royal Birthday

a-royal-birthday

I usually plan my LOs ahead of time but with this one I just let go and went with the flow and I guess it turned out OK. 🙂

This is the first time I used black and white photos, I’ve seen it being used a number of times and the effect appeals to me. I decided to do it here to draw attention on the smaller photos and also to make my page less busy than it already is.

Up close:

a-royal-birthday1

a-royal-birthday2

a-royal-birthday3

I like the outcome of this LO, it’s a nice break from all the linear pages I’ve been doing lately.

Journaling :

My baby, I can’t believe it has been ONE year since the first time I saw you. It has been amazing watching you grow. You’re such a charmer and you rule my life like a KING that you are!

I’m looking forward to the years ahead, knowing you will fill my life with LOVE, LAUGHTER and HAPPINESS!

Love u always,
Mommy

Materials:
Bazzill Basics Cardstock
Chatterbox, Statue Plaid Patterned Paper
Making Memories {Note}worthy Journaling card
DCWV Paper Flowers
Buttons & brads
Ribbon

Tools:
Cuttlebug
EK Success Cutter Bee Circle Scissor
EK Success Image Tree Clear Stamps
StazOn and ColorBox Ink Pads
ZOTS clear adhesive dots & Tombow tape runner

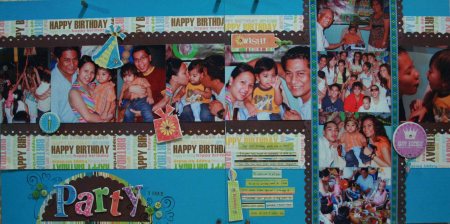
2-Page LO: Party Time

party-time

With this LO I started with a sketch, I usually do, ‘coz it makes scrapping easier if I have a “blueprint” to work on. Then I determined the sizes and the number of photos I’m going to use. I resized each photo using Photoshop and printed it all at the same time and then after that I just cut and paste everything.

I framed my photos using a brown paper which I punched with Threading Water to separate the colors from the background paper. For the title, my original plan was to make a banner on the left page and paste the letters P-A-R-T-Y, but then when I tried it, it just looks too cluttered that I changed my plan and placed the title on one spot and somehow it balances the vertical line you see on the right page.

party-time1

To finish the page, I just added a few embellishments and my journaling.

Journaling:

Your first birthday party was a blast! Everyone was there to celebrate it with us; Tito Jun even came home from Singapore just to be with you.
All of us worked hard to make your party extra special! Grandpa and grandma also played a big part to make your party possible! That’s how much we all love and adore you.

Materials:
DCWV Cardstocks
DCWV Spring Collection Patterned Paper
My Mind’s Eye Paper (brown & stripe)
ASS Chipboard embellishments
Buttons & ribbon

Tools:
FISKARS Threading Water border punch
Hero Arts clear stamp
StazOn and ColorBox ink pads

Last page: TOY HEAVEN

toy-heaven3

With this LO, I wanted to convey the fun Zach had when he opened his gifts. In choosing lively colors on my page I am able to communicate that feeling.

I printed a large photo (Noticed the red spot on Zach face? Well, that happened due to my carelessness. I was cleaning my scraptuary and I accidentally put the baby wipes against it. Now I have to reprint the whole darn thing) 😦 as my focal point and added 3 smaller photos that show Zach’s emotions. I matted the photos to separate it from the colors of the background paper.

When I started this LO, this is what it looks like…

toy-heaven2

I had to scrap it coz’ it’s just too much and I need to simplify it. (This is what happens if I don’t work with a sketch. I spend a lot of time changing the look of my LO).

toy-heaven1

To finish it off I just added the wooden truck where I wrote my journaling, a few die cut circles and ribbon.

Journaling:

We opened you gifts a day after your birthday. You had fun checking out your new toys and of course you had to “taste” everything when you got the chance. It was great seeing you so excited as you sat in the middle of your own TOY HEAVEN!

Supplies:
DCWV Glittered Patterned Paper
MME Pattered Paper
Provo Craft Wooden Embellishment
Karen Foster Squishies
DCWV ribbon

That’s it for my “B” week. Do drop by again to check out our “C” week. C yah!